Discover the complete lineup of Numberall’s industrial marking solutions. This overview covers our high-performance machinery, custom engraving services, and factory-direct support designed to meet your production needs.
3 Steps to Stamping Jewelry

Recent Posts
Embossing Equipment
Produce high-visibility raised characters with Numberall’s manual and pneumatic embossing equipment. Our male and female die sets ensure clean, legible marking on thin metals, VIN plates, and industrial tags.
Hot Stamping: 3 Practical Applications For Industry
Struggling with durable marking? Numberall’s hot stamping, crafted in the USA since 1930, ensures permanent, vibrant marks on plastics and leather. Boost traceability and efficiency for manufacturers. Discover how!
The Ultimate Benchtop Press for Metal Stamping
Need reliable metal tag stamping? Numberall’s Model 40B, USA-made since 1930, delivers durable, traceable indent marks for makers, veterinarians, and locksmiths. Fast 24-hour shipping, simple operation. Discover now!
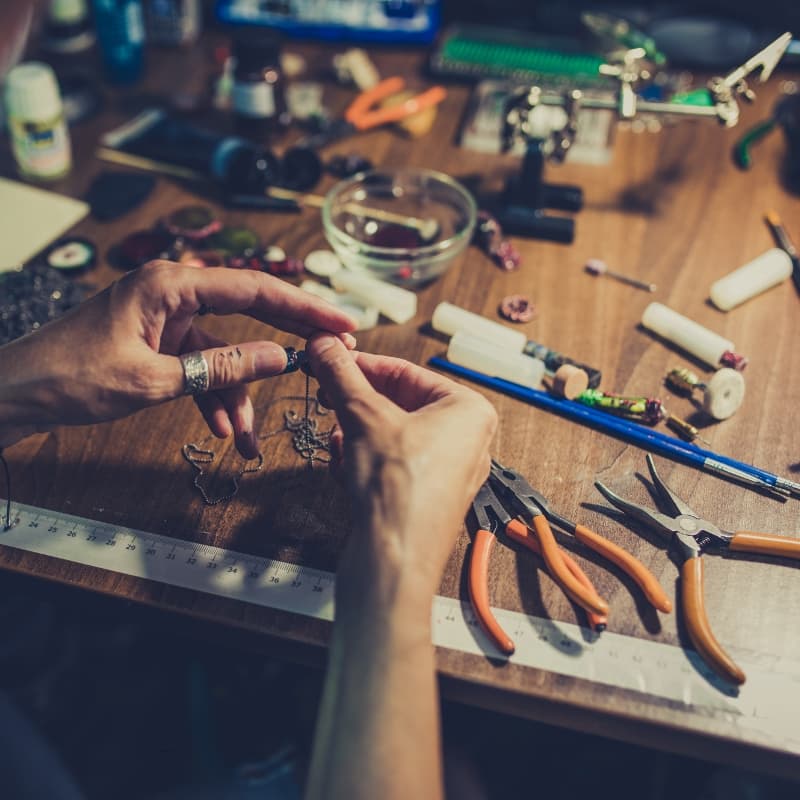
3 Steps to Stamping Jewelry with Numberall Stamping Equipment
Looking to add a unique, personalized touch to your jewelry designs? Stamping jewelry is a fantastic way to elevate your creations, whether you’re adding your brand’s name to a bracelet, a unique serial number to a ring, or a distinctive custom logo to a pendant. Beyond aesthetics, for repetitive marks like company logos or intricate symbols, indenting marking devices from Numberall Stamping Equipment offer a significantly more time and cost-effective alternative to traditional engraving. This process ensures consistent, high-quality results across all your pieces.
At Numberall, we pride ourselves on being experts in providing durable, accurate markings. We truly excel at crafting precision custom-made stamps with your specific logo or design, ensuring every impression is crisp and clear. Ready to transform your jewelry? Here are three simple steps to get started with jewelry stamping, including all the essential tools you’ll need and our recommendations for the most effective equipment.
Step 1: Gather Your Materials for Jewelry Stamping
Before you begin, round up all the essential materials for marking your jewelry. Sourcing from reputable businesses ensures you have the right tools for the job. Here’s a list of what you’ll need:
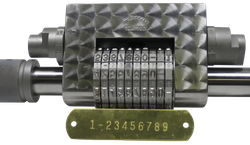
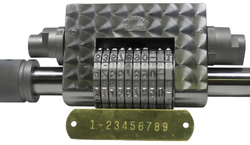
- A Hammer: If you opt for Numberall’s high-quality hand stamps or our rotary stamps, a hammer is necessary to make your mark. Our hand stamps come in a convenient 27-piece boxed set that doubles as a workbench holder. Our rotary stamps are incredibly versatile, offering 40 characters across 3 shanks, eliminating the need for individual stamps as all numbers are integrated into one character wheel. We can also create custom hand stamps with your unique design.
- Jewelry Blanks: These are the foundational pieces you’ll be stamping. You can find a wide variety of jewelry blanks from many online retailers like Amazon and Etsy.
- Bench Block: A solid, flat surface is crucial for clear and effective marks. We highly recommend a thick steel plate as it prevents double stamping and effectively absorbs the marking force.
- Marking Tool(s): Beyond hand stamps, Numberall offers specialized equipment. Our Model 40B is perfect for flat parts and might be ideal depending on the shape of your blanks. Contact us, and we’ll help you choose the best tool for your specific needs.
- Type and Type Holders: Our type holders are designed to ensure a clean, even stamp, even when you’re working with multiple characters.
- Tape (depends on tool you choose) or Pencil and Ruler: For hand stamping, painter’s tape can help you achieve an even mark. Alternatively, a pencil and ruler can be used for precise placement.
Step 2: Personalizing Your Jewelry 
Numberall stamps aren’t just for businesses; they’re fantastic for adding individual personalization to jewelry, making each piece uniquely meaningful. Here are some ways you can personalize jewelry for an individual with our durable, accurate markings:
- Initials or Monograms: Stamp a loved one’s initials or a monogram onto a charm, pendant, or the inside of a ring. This creates a classic and elegant custom piece.
- Special Dates: Commemorate important milestones by stamping dates like birthdays, anniversaries, graduations, or the date of a significant event.
- Meaningful Symbols: Use Numberall’s custom stamp capabilities to add a small, meaningful symbol that resonates with the individual—perhaps a tiny heart, a star, an animal silhouette, or a unique emblem representing a shared memory or interest.
- Short Messages or Names: For a truly personal touch, stamp a short, cherished name (like a child’s or a pet’s) or a brief, inspirational word onto a piece.
- Handwriting Duplication: If you have a special signature or a loved one’s handwriting, Numberall can create precision custom-made stamps that duplicate it, allowing you to transfer that unique script onto jewelry.
Step 3: Practice Your Stamping Technique
Proper fixturing is absolutely essential for a good mark. If you’re new to stamping jewelry, it’s always a good idea to practice on scrap pieces of material first. This helps ensure your marks come out clearly and consistently before you work on your valuable jewelry blanks.
Step 4: Make Your Mark
After gathering your materials, considering your personalization options, and completing a few practice runs, you’re ready to start stamping your jewelry! Adding these custom, durable, accurate markings will make your jewelry appear unique and special, truly personalizing each piece for the buyer or recipient.
Ready to Mark Your Jewelry? 
Interested in learning more about stamping jewelry with Numberall Stamping Equipment? Contact us today to find the best option for you, or download our infographic for quick reference.
Join Numberall News
Get engineering expertise, new product spotlights, and helpful tips for durable parts marking.
Marking Solution?
Get a technical review and quote to meet your specifications.
- Standard or Custom Solutions
- Engineered for Durability
- 95+ Years of Expertise
Recent Posts
Numberall Stands Behind Our Products
Discover the complete lineup of Numberall’s industrial marking solutions. This overview covers our high-performance machinery, custom engraving services, and factory-direct support designed to meet your production needs.
Embossing Equipment
Produce high-visibility raised characters with Numberall’s manual and pneumatic embossing equipment. Our male and female die sets ensure clean, legible marking on thin metals, VIN plates, and industrial tags.
Hot Stamping: 3 Practical Applications For Industry
Struggling with durable marking? Numberall’s hot stamping, crafted in the USA since 1930, ensures permanent, vibrant marks on plastics and leather. Boost traceability and efficiency for manufacturers. Discover how!
The Ultimate Benchtop Press for Metal Stamping
Need reliable metal tag stamping? Numberall’s Model 40B, USA-made since 1930, delivers durable, traceable indent marks for makers, veterinarians, and locksmiths. Fast 24-hour shipping, simple operation. Discover now!
Looking for an economical custom solution to marking your equipment?
Discover custom metal marking solutions for your equipment. With our long history of innovation since 1930, we can meet any requirement. Making it easy to do business with us. Request a Quote today!